
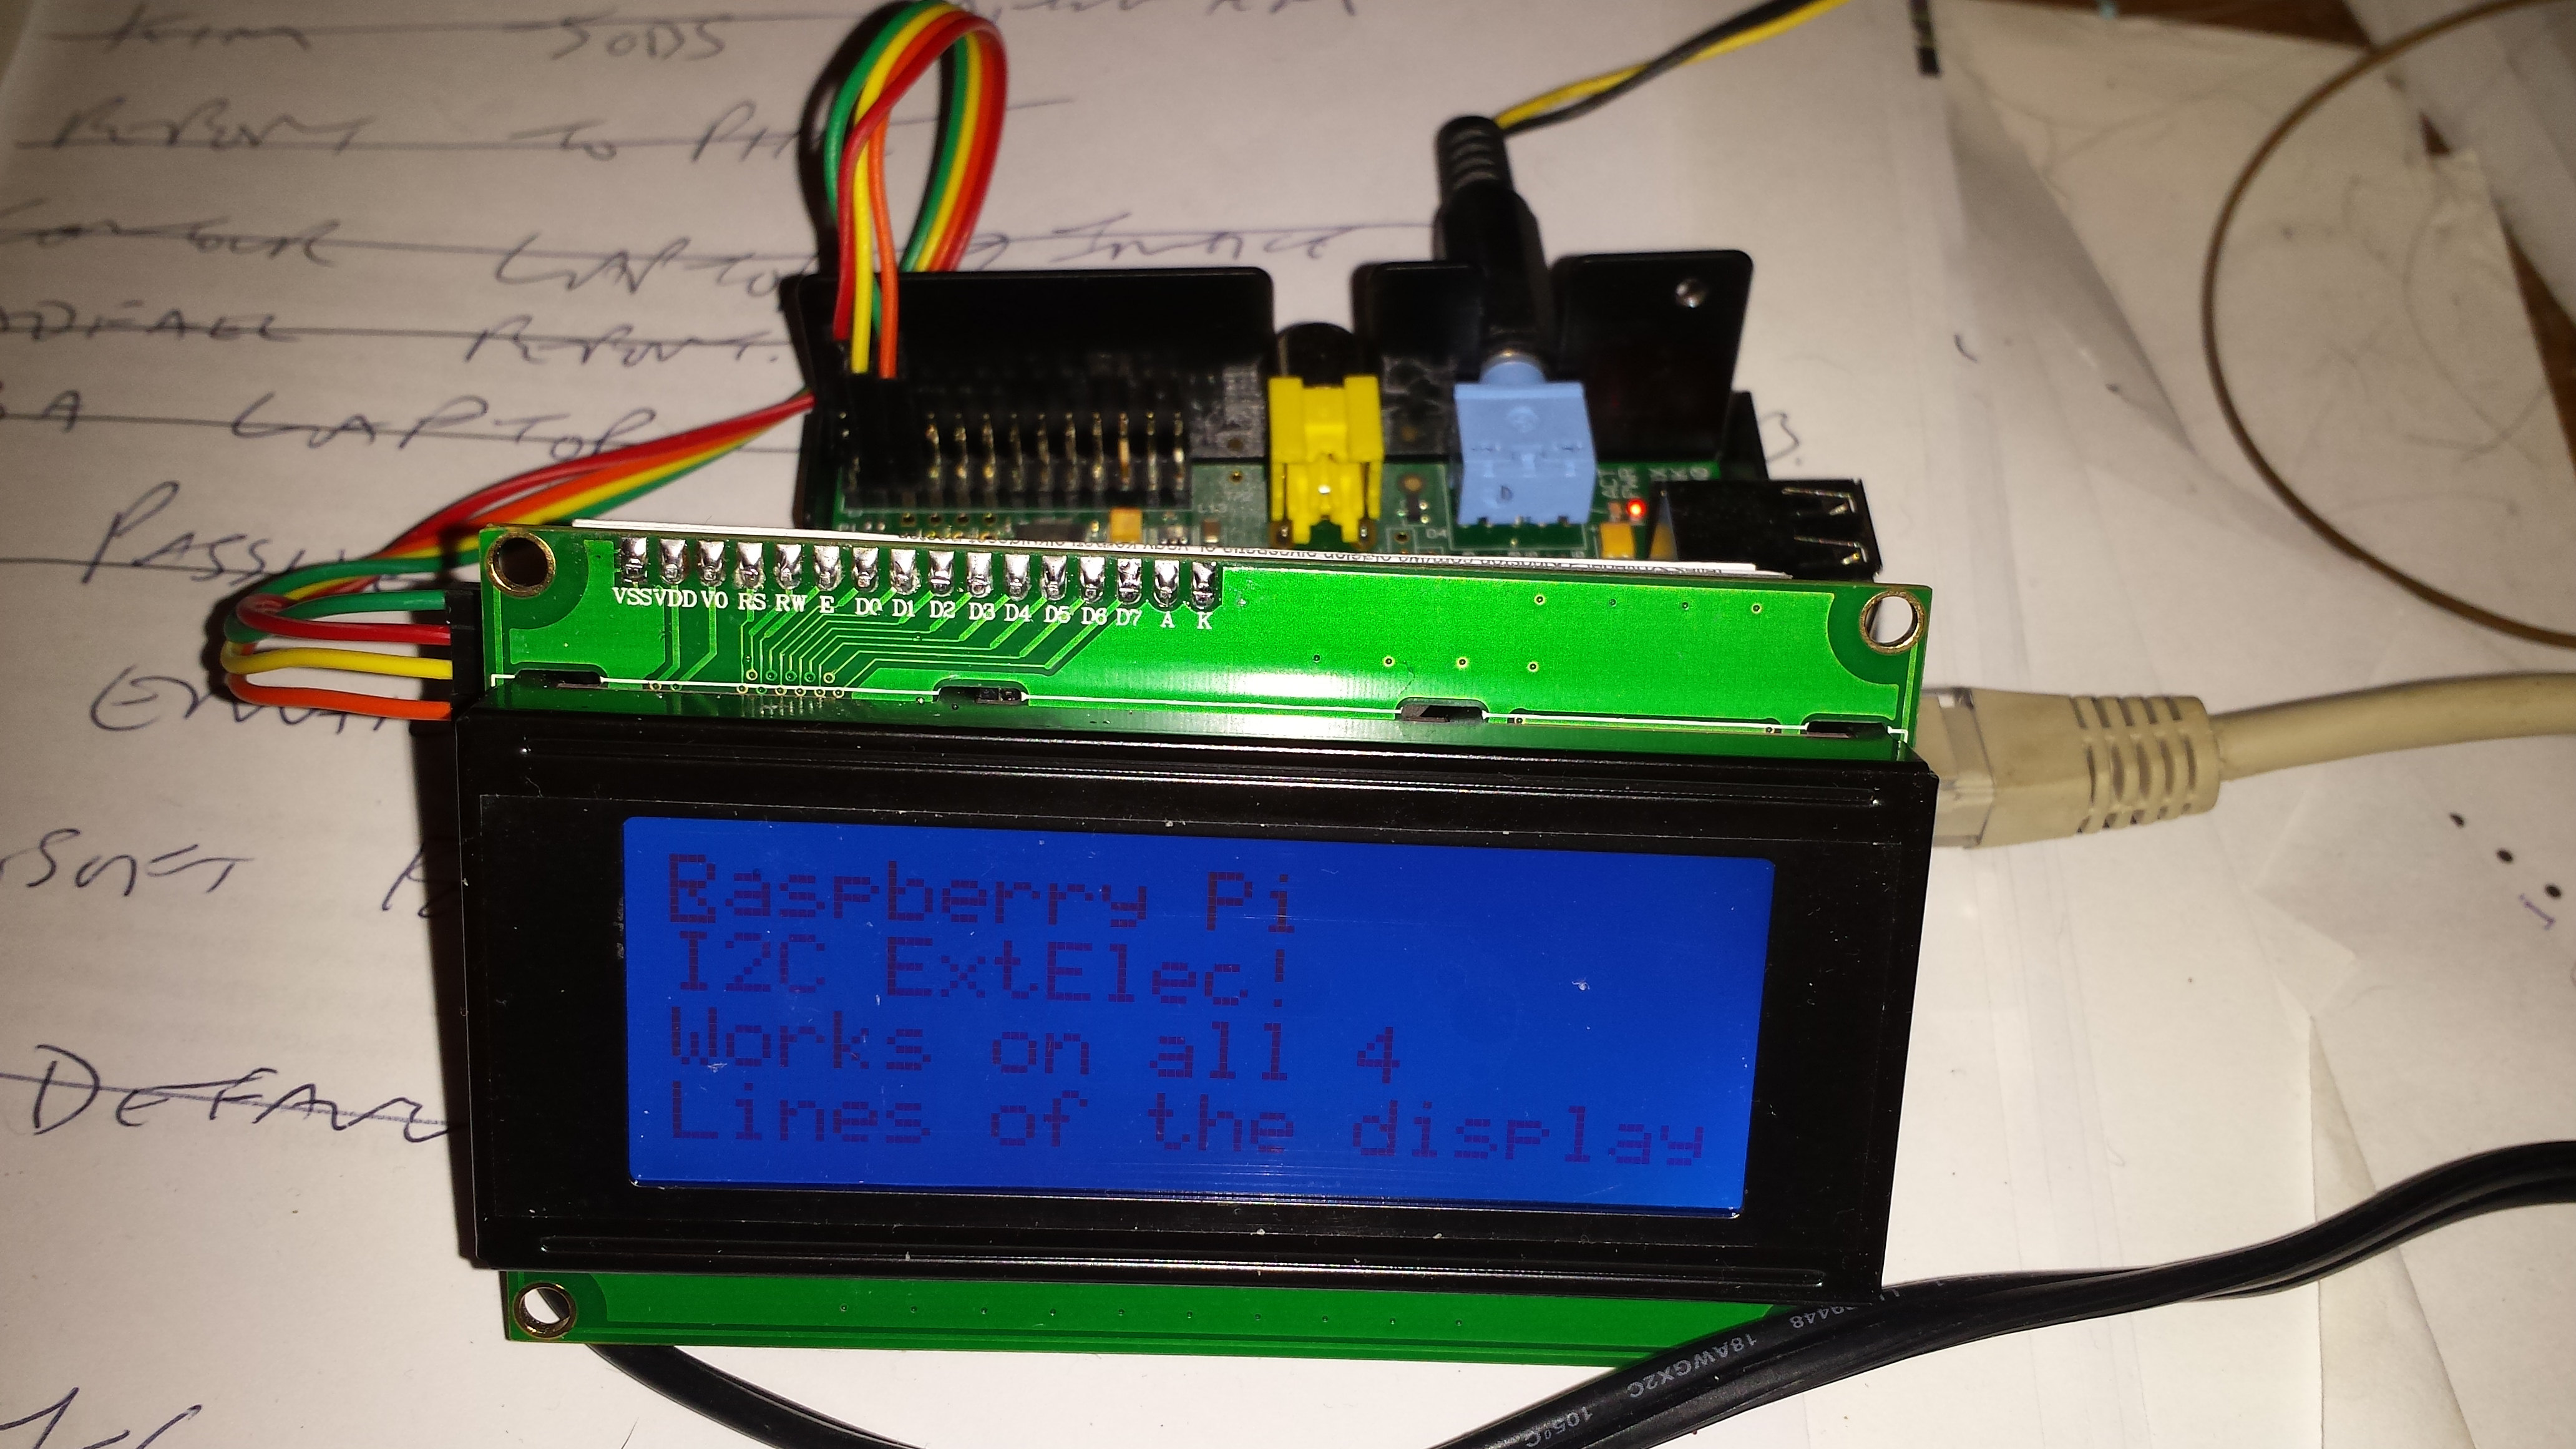
Using the YwRobot to control a 20×4 line display via I2C on a Raspberry PI, what could be easier.
Well, If all of the code was only for an arduino and there being no actual documentation or wiring diagram. Note: Example code IS NOT documentation.
Hey Ho, After some playing around I found the pin arrangement
addr, en,rw,rs,d4,d5,d6,d7,bl

0x27, 2, 1, 0, 4, 5, 6, 7, 3
0x27 is the i2c port address (bus 1 on newer PI’s)
I found this code snippet for a different set of boards http://www.rpiblog.com/2012/07/interfacing-16×2-lcd-with-raspberry-pi.html which was near, but made the display backlight flash and no text output.
So the hacking started…
Basically all of the control lines were on different pins, and I needed to control the backlight (via a wrapper on the i2c write code)
pylcdlib.py
import smbus

from time import *
#
# Modified from http://www.rpiblog.com/2012/07/interfacing-16×2-lcd-with-raspberry-pi.html to run
# 20×4 line display with YwRobot LCM1602 IIC V1 backpack
#
# General i2c device class so that other devices can be added easily
class i2c_device:
def __init__(self, addr, port):
self.addr = addr
self.bus = smbus.SMBus(port)
def write(self, byte):
self.bus.write_byte(self.addr, byte)
def read(self):
return self.bus.read_byte(self.addr)
def read_nbytes_data(self, data, n): # For sequential reads > 1 byte
return self.bus.read_i2c_block_data(self.addr, data, n)
class lcd:
#initializes objects and lcd
”’
Port definitions
addr, en,rw,rs,d4,d5,d6,d7,bl
0x27, 2, 1, 0, 4, 5, 6, 7, 3
”’
def __init__(self, addr, port):
self.lcd_device = i2c_device(addr, port)
self.backlight=1; #default to backlight on
def lcd_init(self):
#set 4 bit mode
self.lcd_device_writebl(0x30) #write
self.lcd_strobe()
sleep(0.005)
self.lcd_strobe()
sleep(0.005)
self.lcd_strobe()
sleep(0.005)
self.lcd_device_writebl(0x20)
self.lcd_strobe()
self.lcd_write(0x28)
self.lcd_write(0x08)
self.lcd_write(0x01)
self.lcd_write(0x06)
self.lcd_write(0x0C)
self.lcd_write(0x0F)
#wrapper to self.lcd_device.write fir backlight control
def lcd_device_writebl(self,value):
if self.backlight:
self.lcd_device.write(value | 0x08);
else:
self.lcd_device.write(value)
# control backlight on=1 or off=0
def lcd_backlight(self,on):
self.backlight=on
self.lcd_strobe()
# clocks EN to latch command
def lcd_strobe(self):
#bit 2
self.lcd_device_writebl((self.lcd_device.read() | 0x04))
self.lcd_device_writebl((self.lcd_device.read() & 0xFB))
# write a command to lcd
def lcd_write(self, cmd):
self.lcd_device_writebl((cmd >> 4)<<4)
self.lcd_strobe()
self.lcd_device_writebl((cmd & 0x0F)<<4) self.lcd_strobe() # self.lcd_device_writebl(0x0) # write a character to lcd (or character rom) def lcd_write_char(self, charvalue): self.lcd_device_writebl((0x01 | (charvalue >> 4)<<4))
self.lcd_strobe()
self.lcd_device_writebl((0x01 | (charvalue & 0x0F)<<4))
self.lcd_strobe()
self.lcd_device_writebl(0x0)
# put char function
def lcd_putc(self, char):
self.lcd_write_char(ord(char))
# put string function
def lcd_puts(self, stringin, line):
if line == 1:
self.lcd_write(0x80)
if line == 2:
self.lcd_write(0xC0)
if line == 3:
self.lcd_write(0x94)
if line == 4:
self.lcd_write(0xD4)
string=stringin + ” ” #blank out rest of line
string=string[0:20];#limit lines to 20 char
for char in string:
self.lcd_putc(char)
# clear lcd and set to home
def lcd_clear(self):
self.lcd_write(0x1)
self.lcd_write(0x2)
def lcd_cursoroff(self):
self.lcd_write(0x0c) #cursor and blink off
# add custom characters (0 – 7)
def lcd_load_custon_chars(self, fontdata):
self.lcd_device.bus.write(0x40);
for char in fontdata:
for line in char:
self.lcd_write_char(line)