Tales of a cheap Chinese Laser Cutter – Bed replacement

Continued from Tales of a cheap Chinese laser cutter – Lasering!

After cutting a large piece I noticed some inconsistency with the quality of the cut from one side of the bed to the other. I’d always intended to replace the silly clamp type bed anyway. Plus It did make me wonder why the cutting sweet spot was 6-8mm above the bed,

so I thought it would be a good time to investigate.

The bed plate obviously wasn’t as flat as I’d would have liked. I suspect this damage was caused by the extractor fan being stowed in/on the bed during transit from China, with no packaging what so ever. Every bump on the journey would have had its toll on the bed.

Luckily the bead is easy to remove with 5 screws. Which sit on 5 standoffs from the bottom of the cutter.

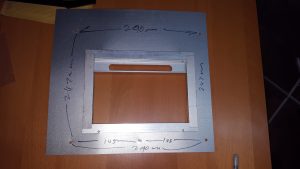
I marked the relative position of all of the holes and set about making a frame.

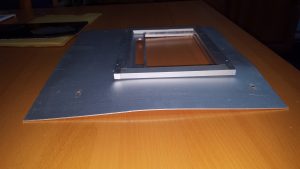
The frame is constructed from 20mmx15mm Aluminum angle (all I could find at a local DIY store. )

I cut these to length leaving a 10mm overlap from the mounting holes. The corners are reinforced by 4 angle brackets.

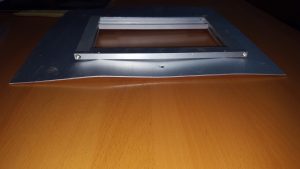
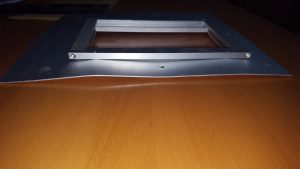
A sheet of steel hex mesh (5mm hex, 400x300mm) was cut to fit into the frame. As I didn’t want anything sticking up above the height of the aluminum frame, I sanded (rough) and cleaned the inside of the angle and epoxied the mesh to the inside edge.

The two batteries ensure the mesh sits flat whilst the glue cures.

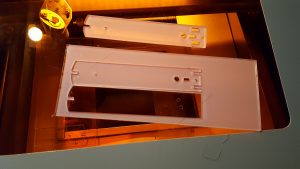
I laser cut some spacers so I can (with a bit of hassle) increase the height of the bed

Replacement bed fitted.

Continued in https://www.extremeelectronics.co.uk/tales-cheap-chinese-laser-cutter-extraction-improving-air-flow/

Save

Save

Save

Save

Tales of a cheap Chinese laser cutter – External info Links

External Links that I have found useful.

Laser alignment guide (Just add Sharks but applicable to most lasers)

0xFred All sorts of good K40 tips

So I bought a cheap Chinese 40W CO2 Laser Cutter and it’s actually OK (Part 3)

Mikes Electric Stuff – Cheap Chinese Laser cutter – A really early K40 blog

40 Watt Chinese CO2 Laser Upgrade with RAMPS & Arudino

Legend of the Cheap Chinese Laser Cutter – Applied Absurdity


My experiences Tales of a Cheap Chinese Laser cutter – Pre-Checks

Tales of a cheap Chinese laser cutter – Lasering!

Continued from Tales of a cheap Chinese laser cutter – Software

With the laser cutter now talking to my laptop. Time for some actual cutting.

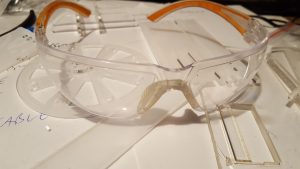
Safety first, now is the time to don your goggles. Luckily, the light from CO2 lasers is absorbed by acrylic (If not it would be useless for cutting acrylic). So a good safety precaution is to use some good acrylic safety specs or goggles. IT WONT PROTECT YOU FROM A DIRECT STRIKE, but for unfocused reflections it will give a good level of protection.

Remember that this laser cutter has no safety lockouts, at all!

If you open the lid whilst the laser is on, you have the equivalent of a small, silent invisible chainsaw, with the safety guards removed.

Power OFF, Lid Open.
Lid Closed, Power On.

One of the reasons I opted for the modifications is mine comes with a physical laser On/OFF switch added, some don’t even have this basic protection.


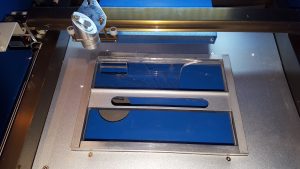
Under the XY bed of the cutter is the clamp for holding your work to be cut. It has a number of failings. It will only allow a sheet of material 90mm x 200mm, which for an A4 capable laser cutter is a bit mad. Also if you cut anything into pieces with small bits of waste, the spring is strong enough to bend the remaining acrylic so nothing is in the same place anymore, although the cutter keeps cutting. The clamp isn’t at the correct height for the focus of the laser. This took me a time to realise, the cuts I were doing were over 0.5mm wide and it made chocolate bar shaped pieces of acrylic when cutting, it was way out of focus.

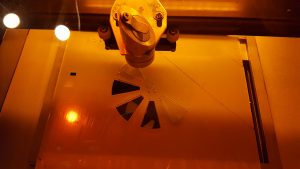
By using some scrap acrylic I did a ramp test (put a piece of acrylic in at an angle and cut a line)

This showed that the focus was actually 8-10mm above this clamp.

So adding in a bed of 6mm scrap acrylic on top of the clamp has sorted this for now. But I need to sort out a metal grill bed to replace the ridiculous clamp (apparently these cutters are used in China for making stamps, the clamp holds a stamp at the correct height for engraving the rubber on top of the stamp)

Woohooo, it cuts and is usable….

Those issues fixed temporally I can now actually use the machine as a laser cutter.


Another superb design decision by the makers

Put a hole just under the top left corner (where all cuts start from) for cleaning out the bits that fall out of your cutting. But of course, if the laser goes through the target piece, it cuts a large hole in your table top. Putting this hole anywhere else on the bottom of the laser would have been such a better idea.

Another extra from the standard cutter was the addition of a set of roller wheels rather than feet. I have absolutely no idea why this is a good thing, all it means is the laser slowly moves across the desk when cutting. This does have one good side, which is it will help to even out the burn marks on the table over time.


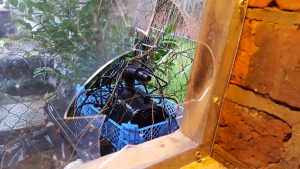
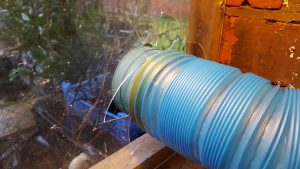
Ventilation, so, I’m in an outside shed, there is loads of draft, I had the extractor pipe just pointed out into the roof space thinking that this would be enough. After a couple of minutes it definitely wasn’t enough, this pipe needs to go outside. Luckily I have an acrylic window, not a problem 10 mins with a tank cutter.

Ok, so that didn’t go entirely to plan…

But the extractor pipe now fits perfectly, can’t see the join…

Add replacing a window to my list of jobs this laser cutter has created.

Continued in https://www.extremeelectronics.co.uk/tales-cheap-chinese-laser-cutter-bed-replacement/


Other useful K40 info sites and blogs Tales of a cheap Chinese laser cutter – External info Links

Save

Save

Save

Save

Save

Tales of a cheap Chinese laser cutter – Software

After carefully checking the cutter ( Tales of a Cheap Chinese Laser cutter – Pre-Checks) It was time to sort out the software.

The software comes on a DVD there are three types of installation guide on the DVD. Ones in Chinese. Ones that are unreadable, and ones in English, that don’t mention software at all. So guessing was the way forward…

The software comes as a pair of plugins for Corel Draw. If you have Corel draw 12 or above, you should be fine. If not there is an instalation of CorelDraw12 on the disk I’m not sure if this has been pirated. I have seen legit older copies of CorelDraw shipped with scanners in the past and there is no way to find out.

The CorelDraw12 comes as a RAR file. For this to work it needs to be extracted to the root of a drive, so either to a DVD, or Memory Stick and installed from there. If you have had any earlier copies of CorelDraw on the machine, you need to uninstall it (and ideally clean the files and registry) before trying the install. If you don’t the plugins will report Version >11 not found.

The Two plugins are called CorelLaser and CorelDRW. These two need to be installed with Administrator privileges

When they are correctly installed CorelLaser will appear in the system tray, and CorelDRW will appear as a plugin in Corel Draw.

in CorelLaser you will need to set the model number of the driver board, this can be found on the driver board PCB. The dongle also needs to be plugged in. The dongle uses a USB serial driver, there are drivers on the disk, but these didn’t work for me. Luckily after removing the USB device in device manager and re-inserting the dongle WIN7 detected and downloaded the drivers itself.

Then just for fun my laptop (not been used for years) decided to install all the windows updates from the last couple of years, I cant blame the cutter for this, but it did mean that in total with all of the dead ends I’d been down software wise, It took me just less then 10 hours to install the software. 🙁

To Be Continued in Tales of a cheap Chinese laser cutter – Lasering!


Save

Tales of a Cheap Chinese Laser cutter – Pre-Checks

I’ve been looking for a laser cutter for some time, and note being able to justify the £2000 cost of a “proper” one eventually decided to go for one of the cheap Chinese ones from ebay.

I will note here that I knew what I was getting in to there are many blogs out there detailing the problems that other people have had with these devices. if you are looking to purchase one, read them …

I have 30+ years experience of high voltage electronics, small scale engineering and experience with all sorts of lasers. If you do not have this sort of knowledge, these laser cutters are not for you.

On first look of the laser cutter after unpacking  a couple of things were obvious. The XY bed was not secured in transit, and the laser head had been banging against the extraction tube

leaving a dented section and the Y stepper ribbon cable had pulled free.

The cable was easy to replace, a couple of screws removed the stepper PCB, push the cable back in and re attach the PCB, but not a good start, I haven’t even powered it up yet!

When unpacking, ensure they you have found all of the packing, Un- screw all of the lids and check inside.
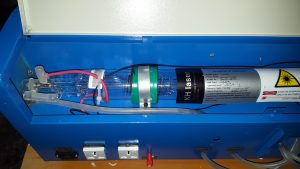
The laser compartment had a number of polystyrene pieces, that would instantly catch fire if  the laser were powered up with them still in place. Also check that all of the cables (and tubes) are securely fastened. A stray lead with 20KV on it or water pumped into the case would not be a good thing. Mine was all good. One thing I have noticed is that the compartments now have alan key screws holding them down. I lieu of any safety switches on ANY of the lids this is probably shows that they have at least read some of the paperwork to gain CE certification.

Look, its CE certified, it must be safe then….

My laser has had a number of additions which I though were a good idea.
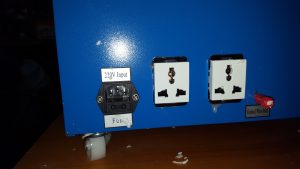
Twin sockets and an IEC mains inlet (some cutters have all sorts of connectors here) Note the earth. DO NOT TRUST THE EARTH PINS ON THE SOCKETS ARE CONNECTED TO ANYTHING. Check, AND make use of the extra case earth.
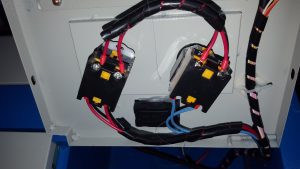
My cutter came with a emergency stop button and a on/off witch (yes some don’t even have that, remember these were  addons..)

Checking these I found that neither had been tightened up and both rotated freely.

Power supply, actually quite nicely put together.

The controller board, on a flappy piece of metal. Make a note of the board numbers you will need them when you run the software.

The fume extractor fan slots loosly onto the rear of the unit

Yes This loosely.

A nice 10mm gap for the air to miss the cutter entirely.

And a lid that doesn’t fit properly with the power connections behind it .

The fan has one more slight problem. It is clinically asthmatic.
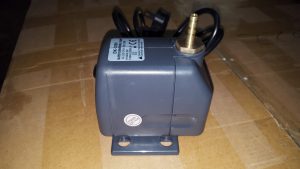
The cooling water pump is just a small garden fountain pump, but it works you even get a good flow from a floor based water butt.
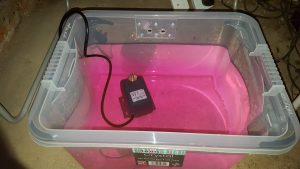
I used a 2 gallon box and made a reinforced plate to take the tubes.  The lid keeps the water clean. The return tube is cable tied so it is above the level of the water. This gives a visual indication that the pump is running. The pink water is anti-freeze as the cutter will be run from an outside shed. Another of the add-ons for this cutter is a water temperature meter, useful as a check, but no cutout for lack of water, or over temperature.

A nice addon touch is the lid light, a very good idea.

To Be Continued in Tales of a cheap Chinese laser cutter – Software


Save