The RC2040
Ive always loved Z80’s Even before programming in high level languages I was had compiling Z80 code on a Nascom1
Recently I’ve discovered the world of emulated Z80’s via the emulator written for linux by Alan Cox (Etched Pixels) (https://github.com/EtchedPixels/RC2014) This allows various configurations of Z80 RC2014 (https://z80kits.com) machines to be emulated (along with 8080 8086 and may other 8 and 16 bit processors)
My C code was rather rusty and I wanted a project to re teach me the basics.
Starting with the Etched pixels code I quickly got it running on a Raspberry PI Zero and added a few simple peripherals.
Which is all fine, but well it was, all a bit easy.
Not So easy
So, I was looking for a project to play with the RP2040, ideal, apart from The RP2040 doesn’t give a linux OS, It doesn’t have any storage (other than its own flash) and it only has 240K of memory.
To emulate a CPM system you need a minimum of 64K (plus a switchable ROM) some form of storage, ideally removable. Some way of loading the ROM (although this can be compiled in as an image) and a serial terminal.
Well the serial terminal is easy, there are 4 plus USB to play with, although all of the emulation uses STDIO uniquely, which is only partially supported on a PI Pico in C
As I was only interested in the Z80 bits of the emulation and only with the peripherals commonly supported on an RC2014. I started on the Raspberry pi, removing all of the other non z80 library’s and the other peripherals I wouldn’t need.
This was easy, rip a bit out, patch the code so it didn’t require it, edit the make file, recompile, test. Repeat until you have a basic Z80 emulated machine.
ROM/RAM
The ROM, I temporally coded into C via the linux xxd command, from one of the factory ROM’s available on the RC2014 git hub. https://github.com/RC2014Z80/RC2014/tree/master/ROMs/Factory
The next problem is that the emulator as configured uses 512K of ram (RC2014 – 512k ROM 512k RAM Module) to emulate a paged ram card. As the RC2040 only has 240K of memory I needed to remove the Ram/Ram paged memory code and replace it with a 64K ram/Rom paged emulation (RC2014 64k RAM Module and RC2014 Pageable ROM Module), that will only take at max 128K. It also must allow for the ROM to be paged out to allow the bootloader to be installed at 0x0000.
Using the compiled ROM I could easily fill an array of uint_8 with a ROM image, and switch using port 0x38 as a RC2014
CPM
CPM was emulated using the EtchedPixels code for a removable CF card. The Binary is readily available already configured to boot on an RC2014 again from the RC2014 git hub https://github.com/RC2014Z80/RC2014/tree/master/CPM
From the CPM source image (.img) file, you need to make an IDE file system onto a .cf file. using CPMtools. Details are towards the bottom of this page under “CP/M Application Disks” https://github.com/RC2014Z80/RC2014/tree/master/ROMs/CPM-IDE
Luckily this CF file can again easily be tested by loading up the image using the RPI z80 linux emulator.
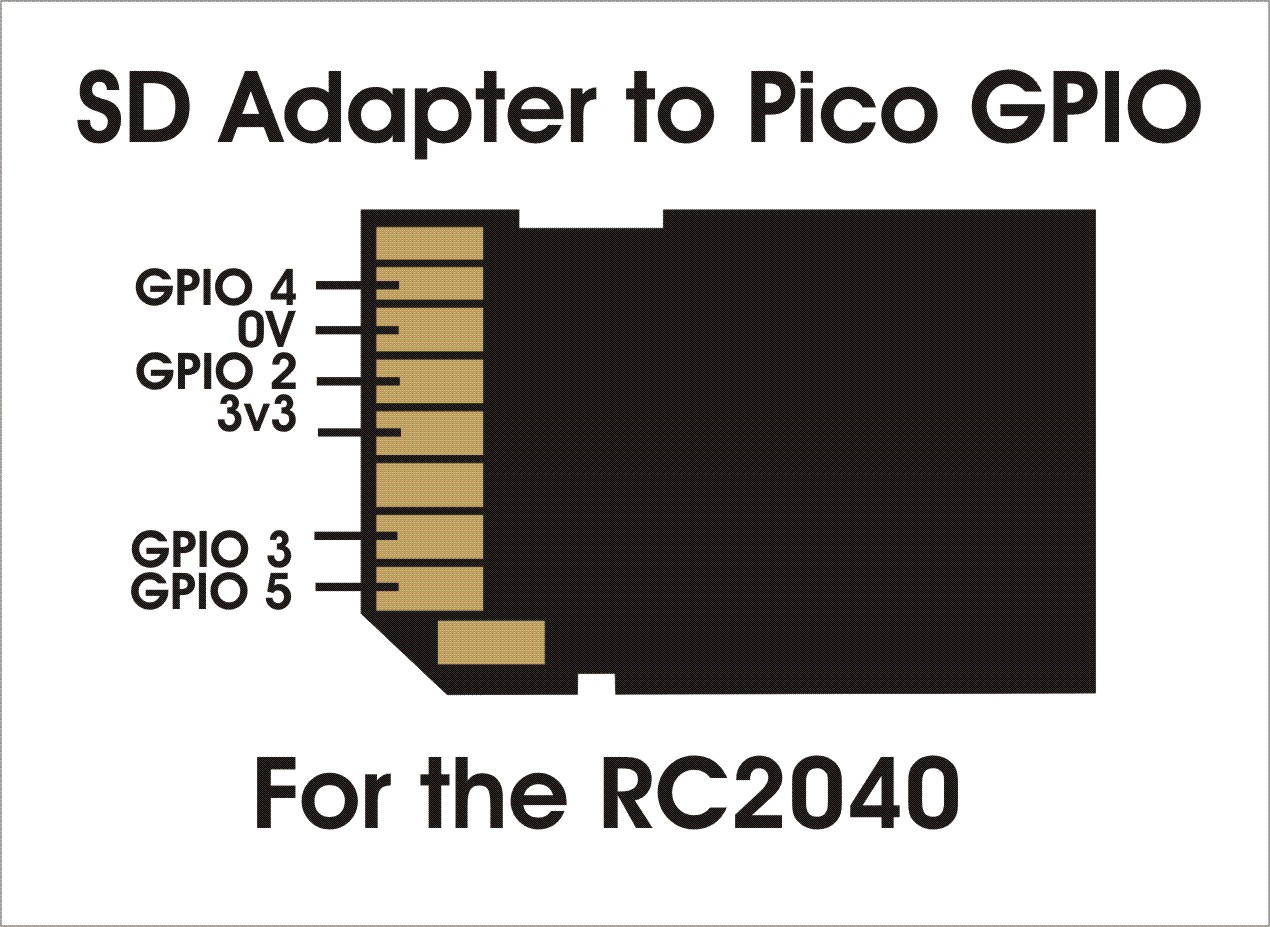
SD Card
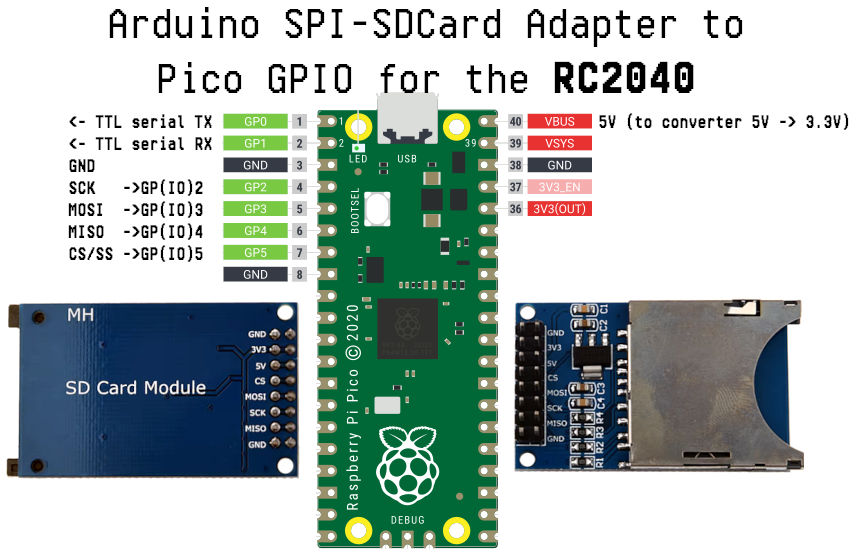
Of course the Pico doesn’t have any storage like a CF card and the 3.3v bus makes interfacing to a 5v CF difficult, but there is the possibility of using a SD card via SPI.
Luckily there is a library for SD cards which works with the PICO no-OS-FatFS-SD-SPI-RPi-Pico https://github.com/carlk3/no-OS-FatFS-SD-SPI-RPi-Pico
Working through the example was straight forward and gives a great way to test your SD card connections and if required, format a fat32 SD card.
The connections to the SD card are simple, 4 wires and power.

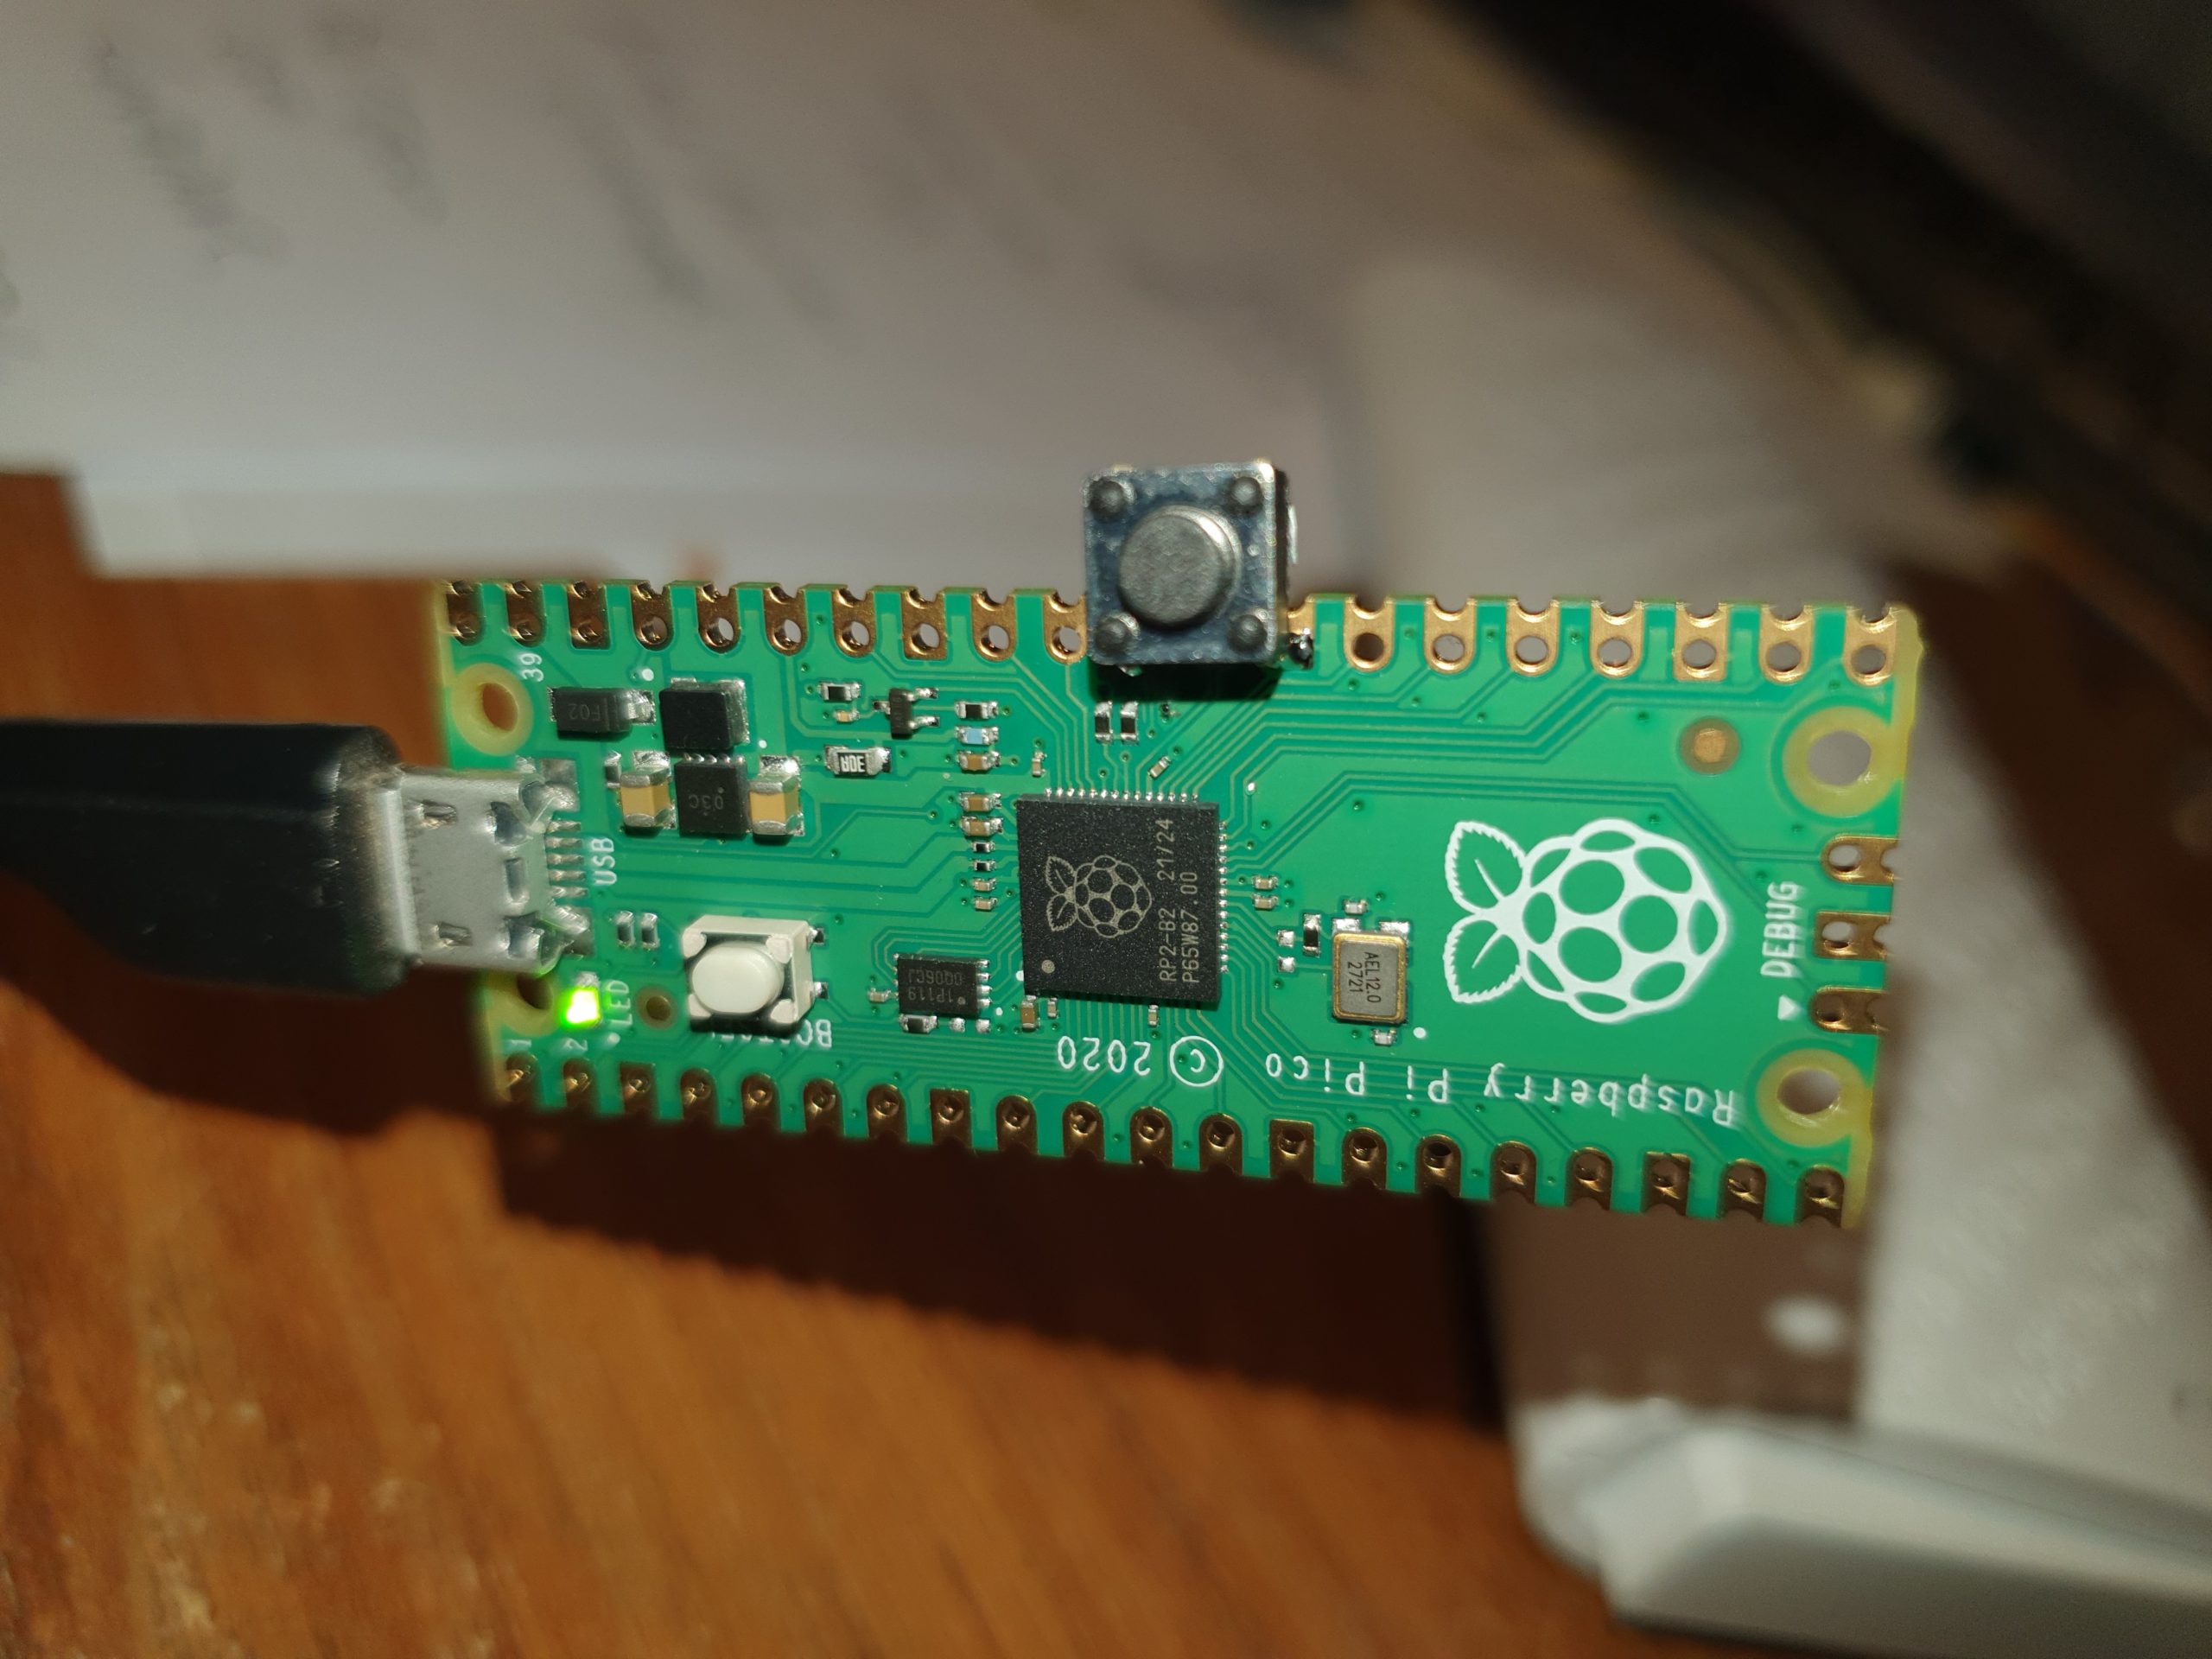
PICO or bust
At this point there is no way we can test the code on a RPI, so we need to dive into the PICO.
Compiling the code to the PICO without IDE support was surprisingly straightforward. All that was required was to replace the TX/RX STDIO calls with a call to the PICO UART. Unfortunately there was no easy non-blocking call to the receive queue using the USB serial. So initially the input/output was all via the hardware serial port.
I tackled the SD card next, making a simple bit of code to read a 64K rom image from the CD card directly into the ROM array, so I could remove the horrible compiled C ROM. The ROM images came directly from the RC2014 Factory ROM images on Git hub.
Buttons and switches
To make the ROM selection easier I added three switches to emulate the RC2014 A13, A14, & A15 ROM select jumpers, This meant I could easily switch between ROM starting addresses when loading from a rom image.
As I was adding switches, I decided to add a few buttons. which give me a Z80 reset and a dump RAM initially as a hex dump to the terminal, and latterly as a .bin file into the CD card for debugging.
To allow for a switch-less operation for the switches / buttons to work you need to ground GPIO 22, otherwise the RC2040 will run with switch-less defaults( currently CPM ROM and USB serial)
PICO CPM
I changed the IDE library to use the FatFS-SD-SPI-RPi-Pico file system and pointed it to load the .cf image from the card.
After A LOT of playing around with the differences in read/write and seek, plus RAM/ROM switching and serial problems. It finally loaded 🙂
I also found that if I disabled the RAM/ROM switching on a emulated z80 reset (from the button), I could warm boot into CPM, bonus…
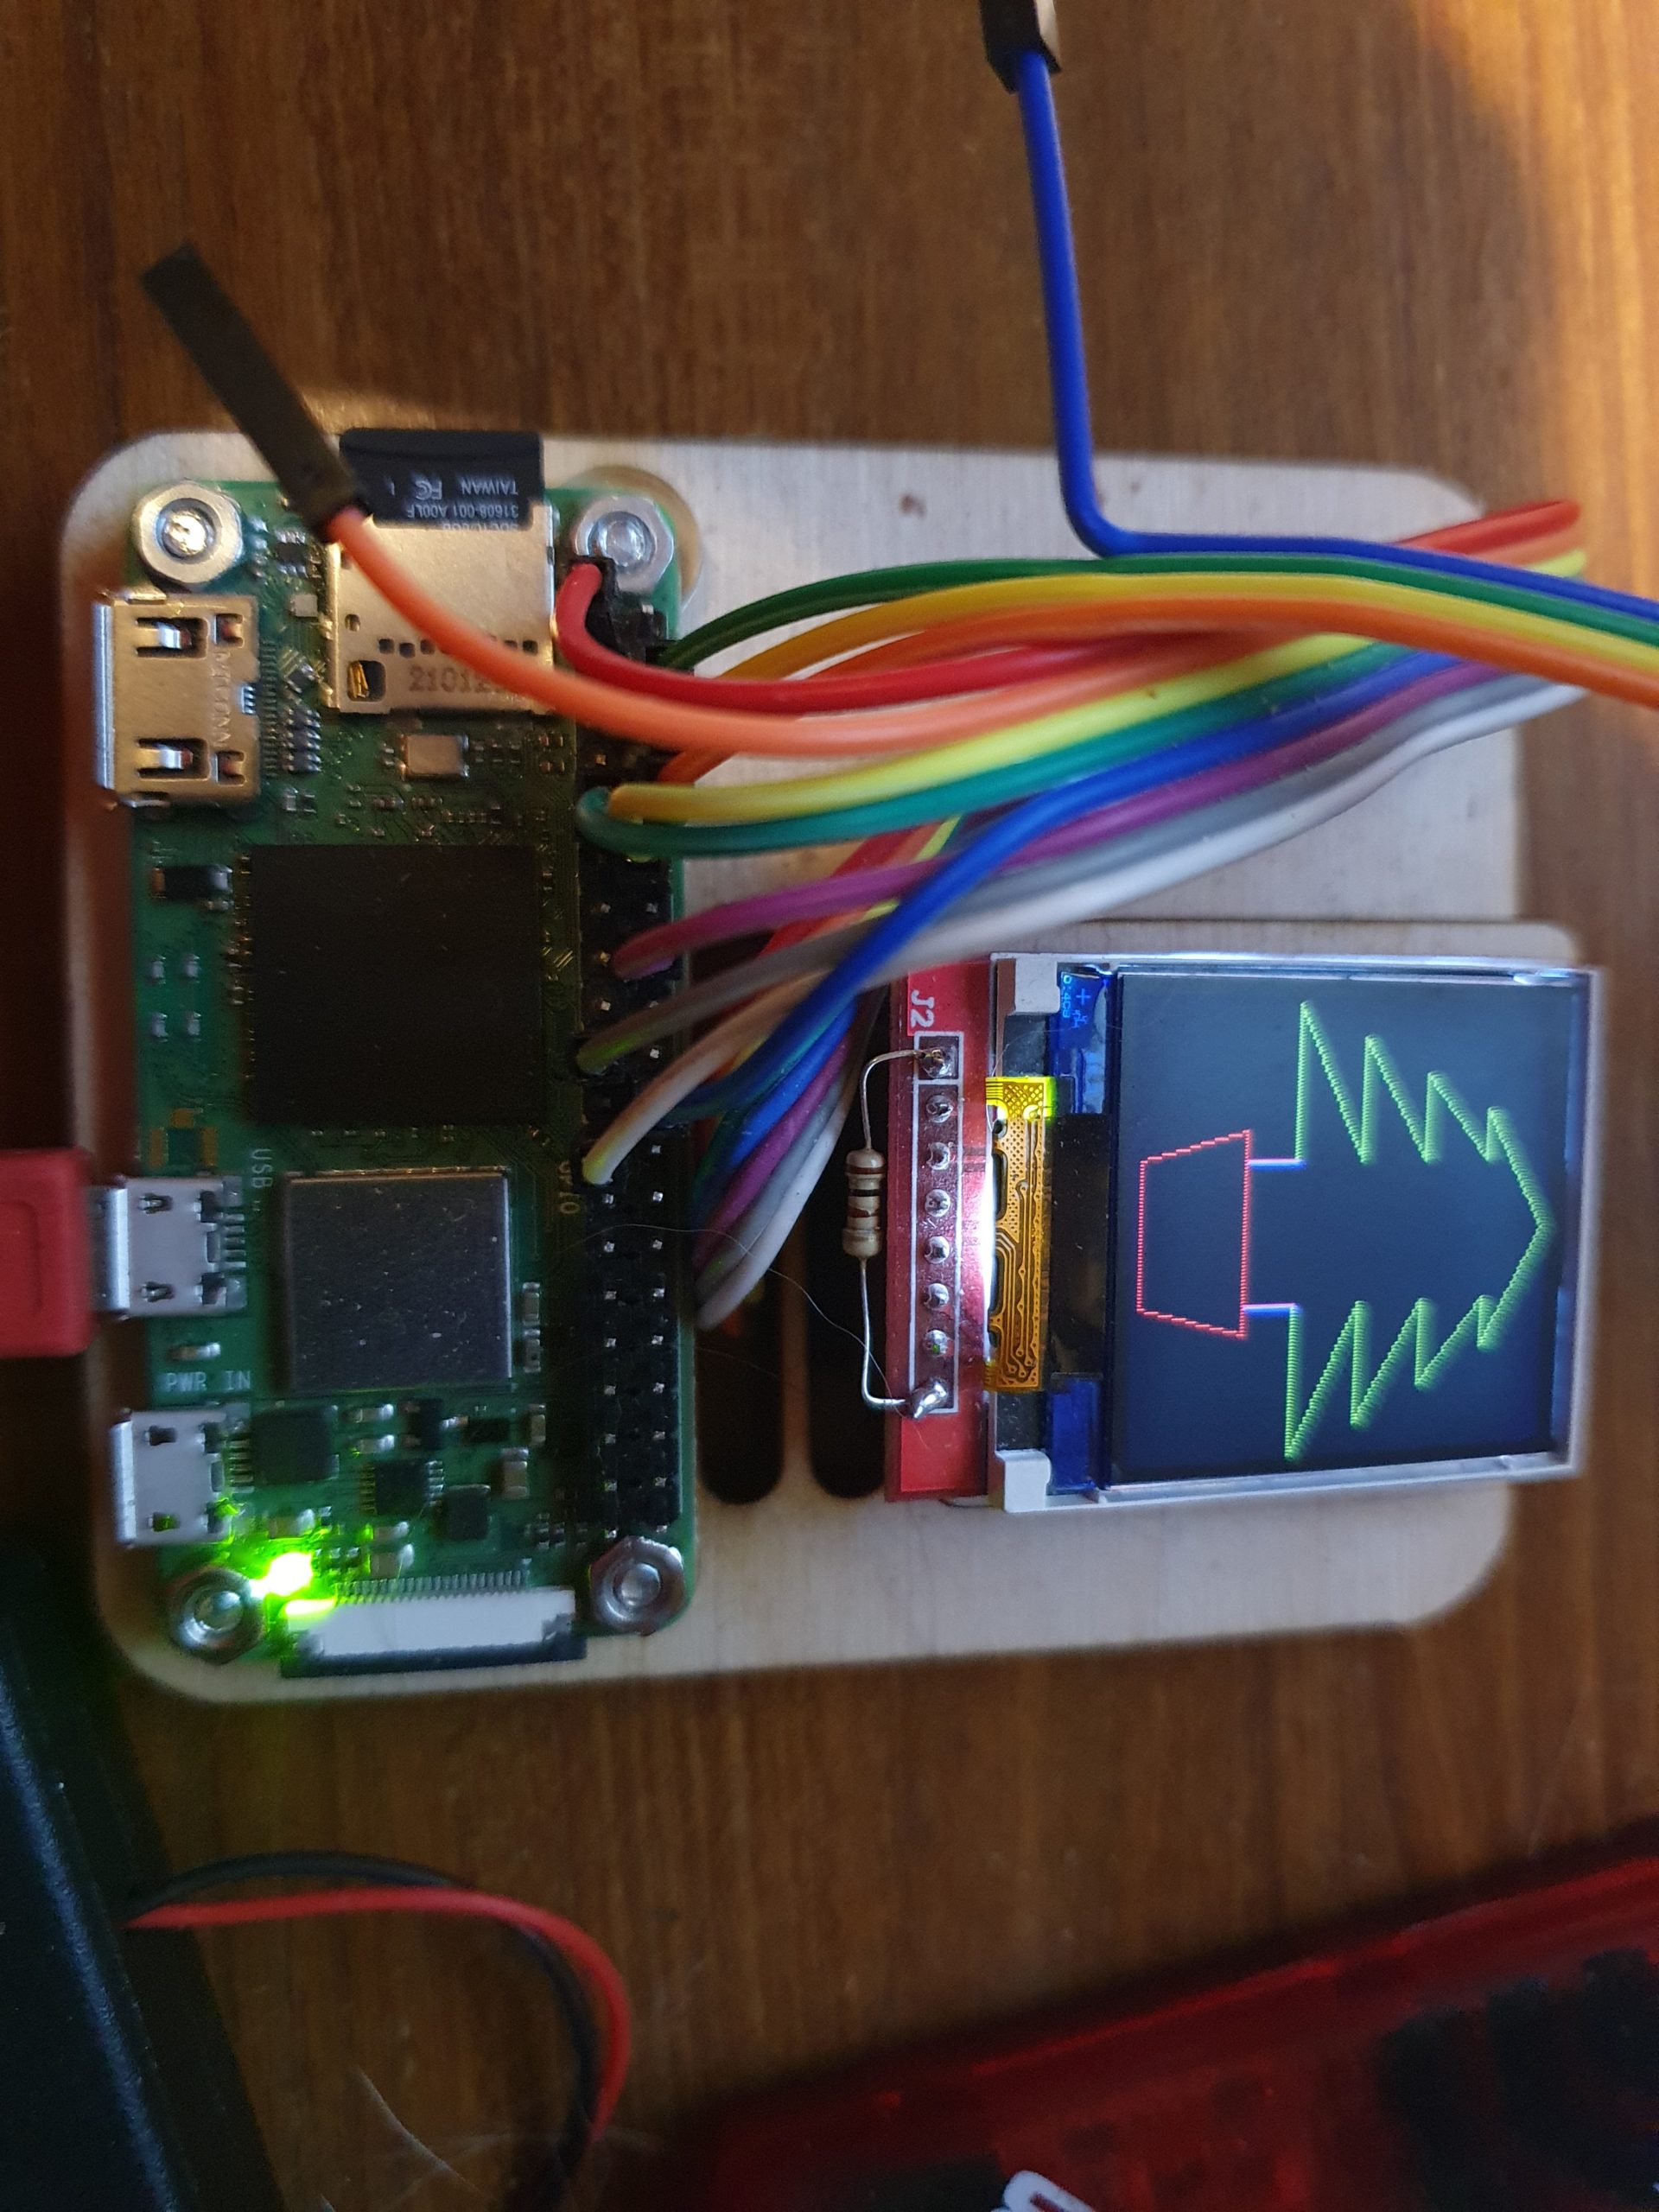
Circuit
More Serial fun
Eventually I sorted the problems with the blocking USB serial by writing an interrupt driven routine that fills its own circular buffer, so now (from a switch) you can select which serial port you prefer.
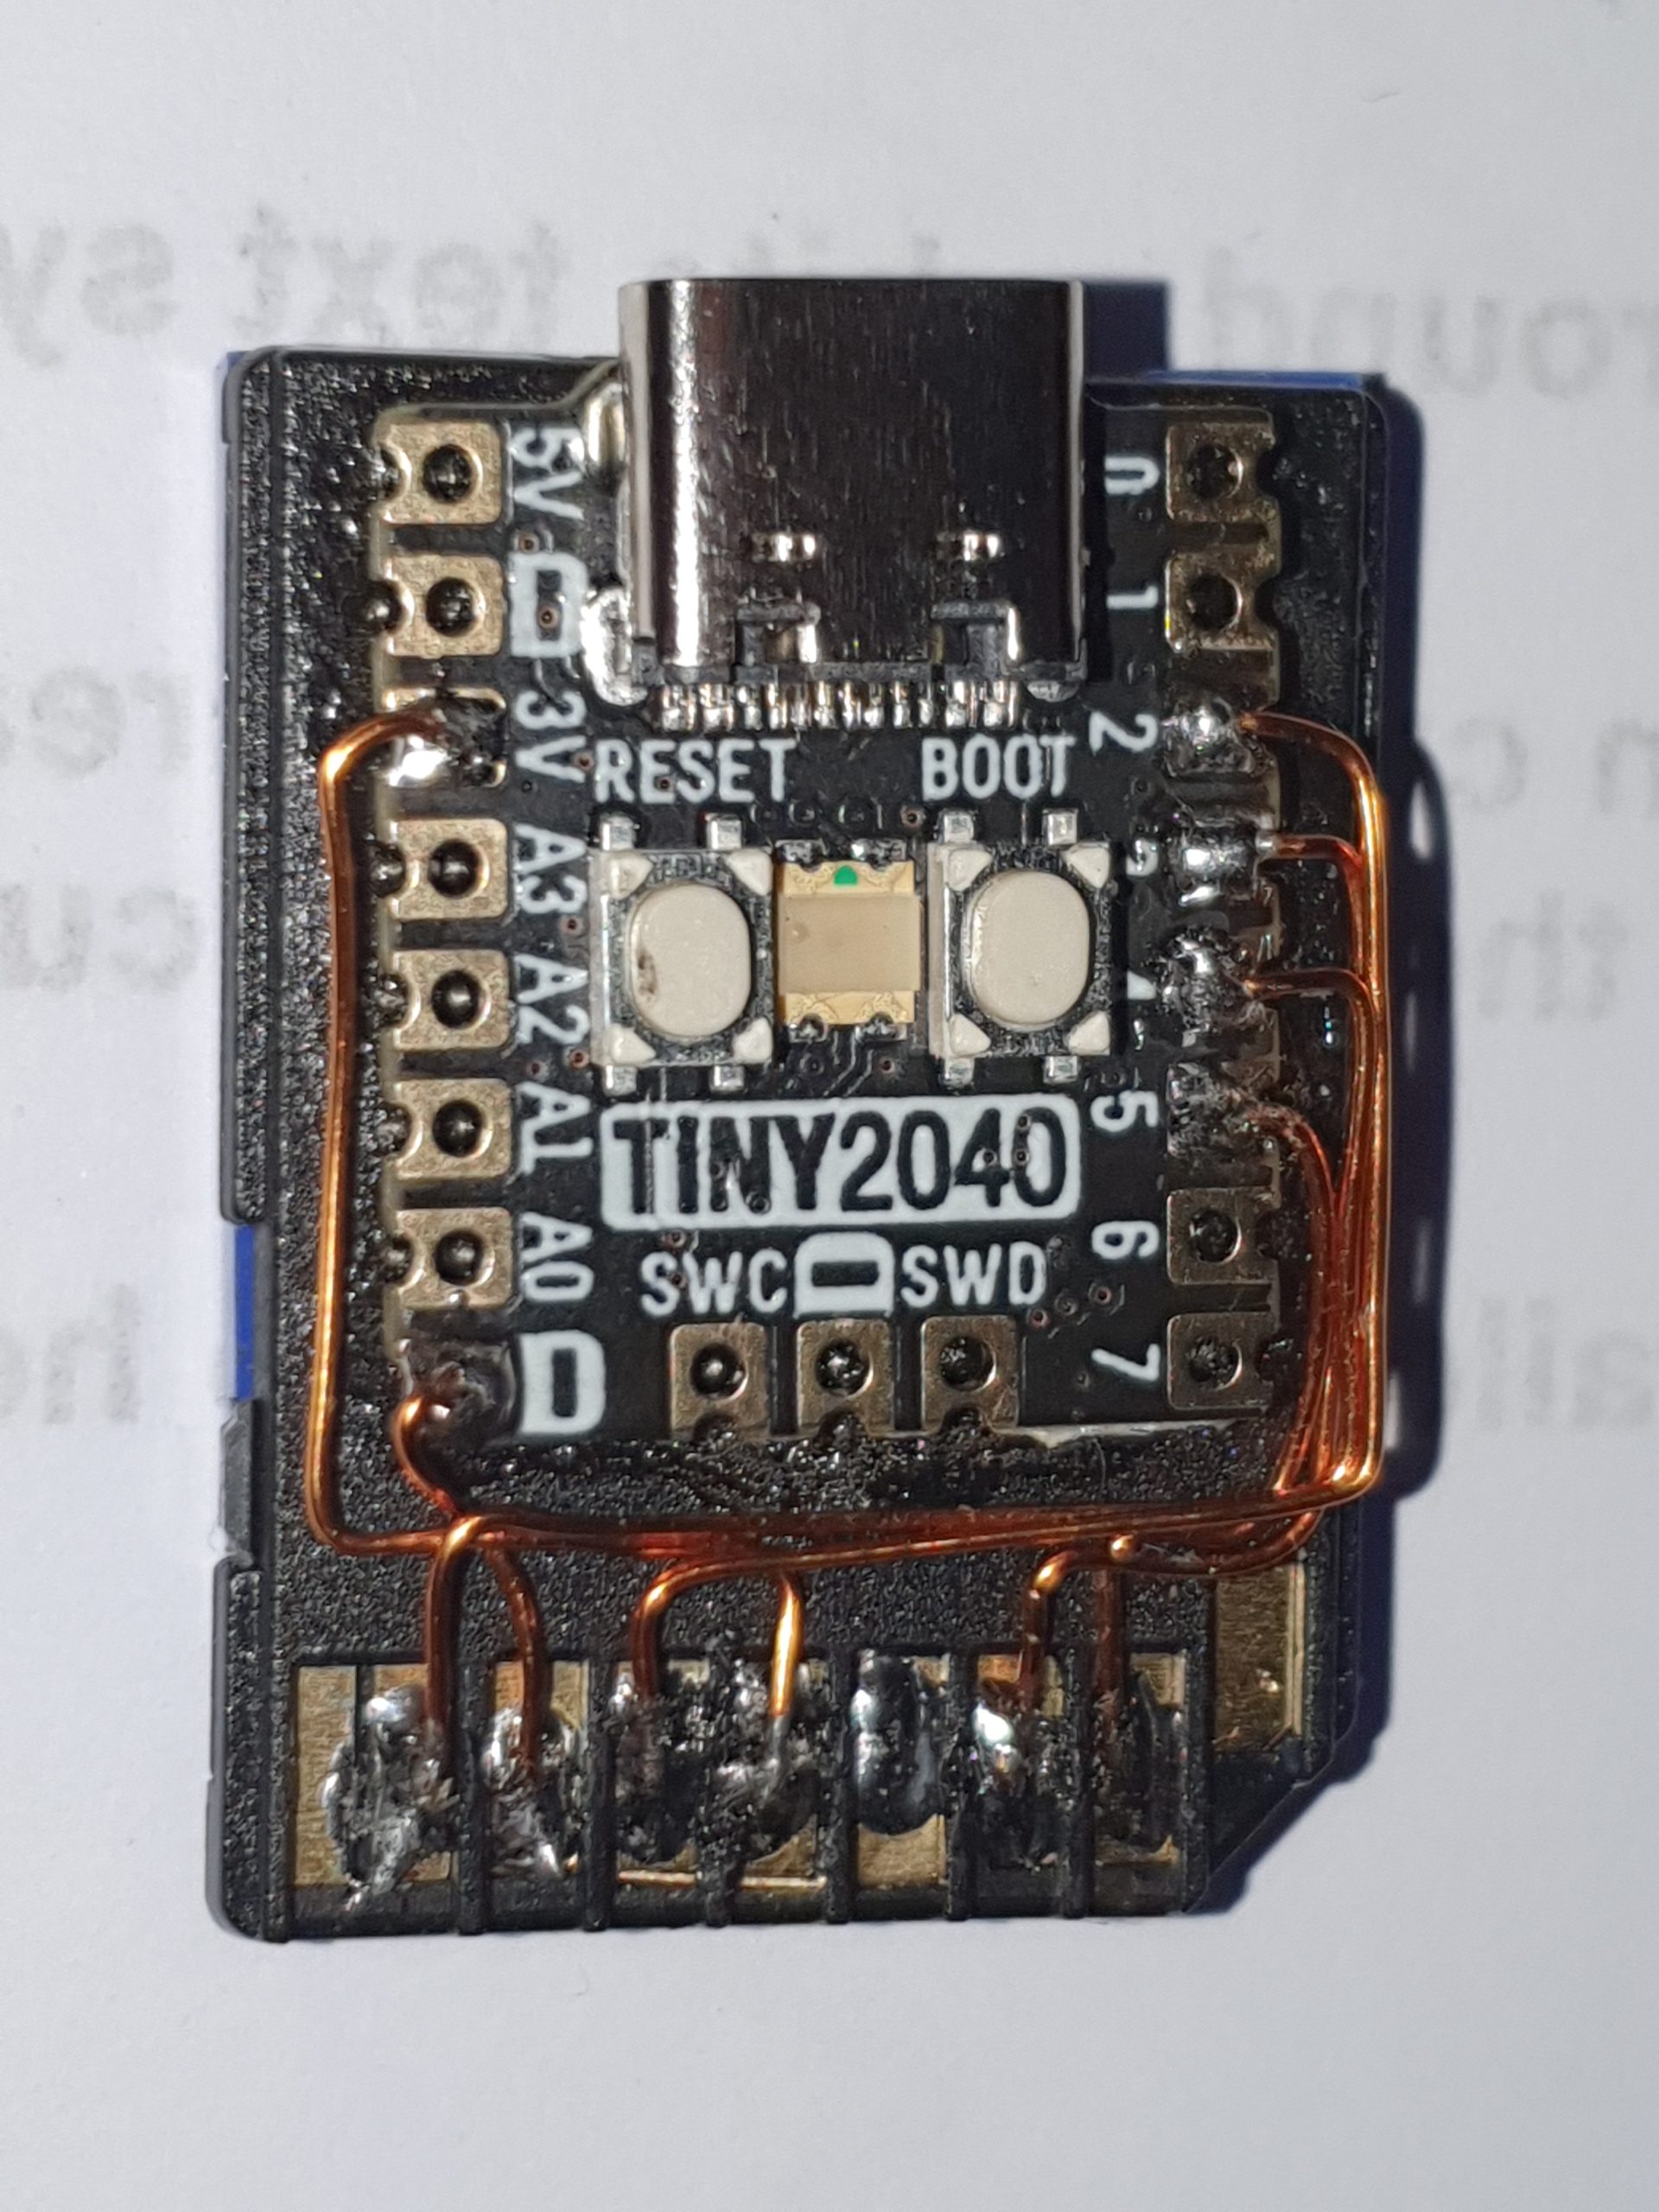
Tiny Rc2040
If you don’t need the switches/ buttons, you can run it without, using a Pimoroni Tiny 2040 using the USB serial, making the smallest z80 CPM machine, ever (unless you know different?)

vbnvbn
Make your own
All of the files to emulate a Z80 with IDE on SD are available via git hub https://github.com/ExtremeElectronics/RC2040
Unfortunately I haven’t quite solved the Serial issues yet. The serial interface(s) will only take characters as a really slow rate. If you are going to cut/paste code into the RC2040 you will need to add in a 40mS (or longer delay) into your terminal program.
Serial issues are much improved. If added a block to the RX char circular buffer code that will only allow char RX, if the ACIA isn’t currently in an interrupt and added a fake interrupt to drive the USB RX circular buffer in the same way as the UART RX
Added SIO support and some bodges to delay the emulated interrupts to allow serial as fast as the Z80 emulation can cope with.
Using Terra term I can now drop files onto the RC2040 with only a 1ms TX delay.
Continued here