The INI file
The ini file sets the defaults for the Rc2040 and substitutes for switches and buttons on boards that have none.
It allows you to select the ROM, RAM settings, and CPM settings for the emulation.
Using SIO based software
Requires CPM Inc Transient Apps SIO2.img,CPMIDE.id, 24886009.BIN and rc2040.ini for SIO2 as below
Rom Details
ROM has basic at address 0x0000 (000) ROMsize 0x2000
ROM has basic at address 0x2000 (001) ROMsize 0x2000
CP/M / Basic via monitor at address 0x4000 (010) ROMsize 0x4000
Small Computer Monitor at 0xe000 (111) ROMsize 0x2000
More detail at [https://github.com/RC2014Z80/RC2014/tree/master/ROMs/Factory]
RC2040.INI for SIO2
Config with no switches and other emulation settings for SIO2
[IDE]
idefile = “CPM Inc Transient Apps ACIA.img”;
idefilei = “CPMIDE.id”;
[ROM]
a13 = 0; // Address switches 0=0x0000 100=0x8000 111=0xE000
a14 = 1;
a15 = 0; // ROM file as ROM source
romfile = “24886009.BIN”; // source for Rom Loading – see a13 a14 a15
romsize=0x4000; // Size of ROM
[CONSOLE]
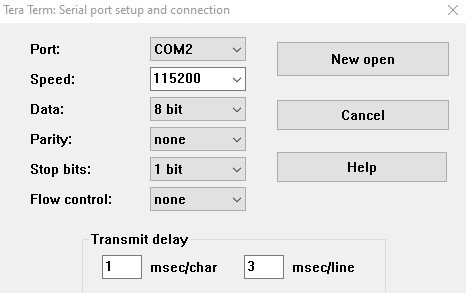
port = 1; // Console port 0=UART or 1=USB
[EMULATION] // ACIA=0 SIO=1;
serialtype = 1; //SIO selected
inidesc=”SIO using 24886009.BIN”; //describe the ini
[SPEED] //vPico overclocking *1000 Mhz
overclock = 250; //overclock the PICO at 250 x 1000
Using ACIA Software
Config with no switches and other emulation settings for ACIA
Requires CPM Inc Transient Apps ACIA.img,CPMIDE.id, R0001009.BIN and rc2040.ini as below
Rom Details
Rom has basic at address 0x0000 (000)
CP/M via monitor at address 0x8000 (100)
Small Computer Monitor at 0xe000 (111)
More detail at [https://github.com/RC2014Z80/RC2014/tree/master/ROMs/Factory]
RC2040.INI for ACIA
Config with no switches and other emulation settings
[IDE] idefile = “CPM Inc Transient Apps ACIA.img”;
idefilei = “CPMIDE.id”;
[ROM]
a13 = 0; // Address switches 0=0x0000 100=0x8000 111=0xE000
a14 = 0;
a15 = 1;
// Size of ROM
romsize=0x4000;
#ROM file as ROM source romfile = “R0001009.BIN”; // source for Rom Loading – see a13 a14 a15
[CONSOLE] // Console port 0=UART or 1=USB
port = 1;
[EMULATION]
serialtype = 0; // ACIA=0 SIO=1; ACIA selected
inidesc=”ACIA using R0001009.BIN”; //describe the ini
[SPEED] //Pico overclocking *1000 Mhz
overclock = 250; //overclock the PICO at 250 x 1000
Other INI options.
[ROM]
jumpto = 0x2000; // non standard start vector (e.g not 0x0000);
ramonly = 1;// ram only (no rom, 64K load from romfile);
[PORT]
pioa=0; // set the IO address of the 8 bit port
[IDE]
ide=0; //Turn off IDE
iscf=1; //enable cf file as idefile, rather than the .img format
[EMULATION]
inidesc=”Broken INI file”; //ini file description to show at boot
[DEBUG]
trace = 0 // trace details in RC2040.c
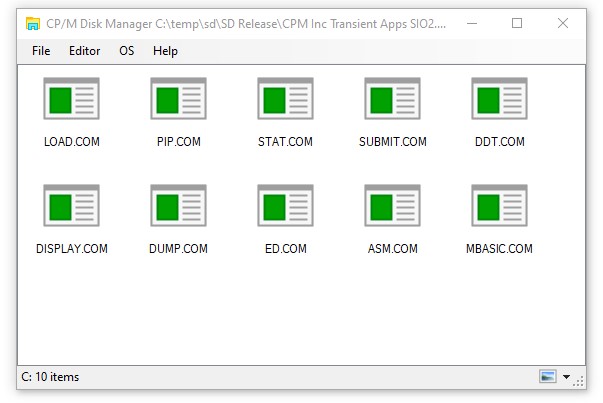
CPM Manager / CPM Tools
You can edit the contents of the SD card .img file using CPM Manger and directly add or remove files in the CPM img.
CPM Manager is available here.
If you are using Linux (or windows), you can use the CPM tools to add or remove files. CPM tools are available here If you are using CPM tools, you will need a diskdef files. Disk defs for the RC2040 format(s) are available here DiskDefs
PIO PORT
8 bits of a simple IO post are brought out to the RP2040 GPIO as an input/output port. The port is configured on the fly, So if you execute an IN instruction, the port becomes an input port, (with pull ups). If you execute an OUT instruction the port becomes an output port. (The Original RC2014 port is arranged as 8 outputs and 8 inputs, but there were only 8 bits available. )
Switches and Buttons
Details are in the Circuit diagram . Switches and buttons are not required. But give you direct access to the ROM addresses (top 3 address lines) and the buttons allow for a z80 reset, Dump and other functions.
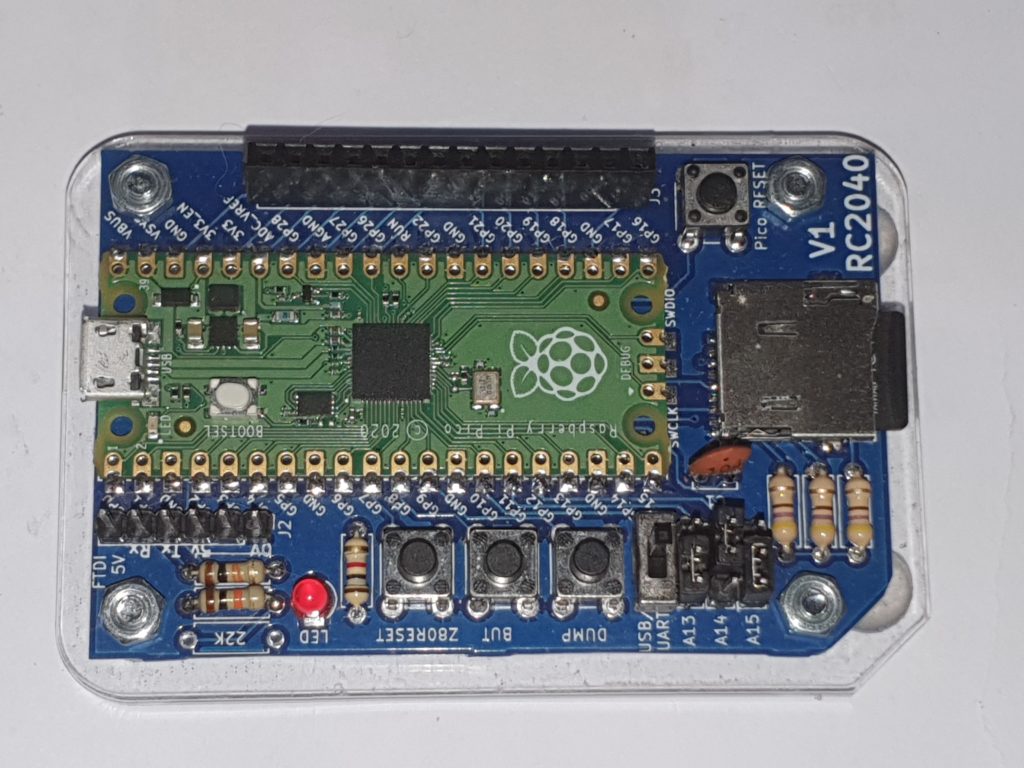
A complete kit of parts for the RC2040 is available here from Extreme Kits