
A work in progress
Programming the PI Pico
The easiest way to do this is to go to the latest release of the RC2040 Git hub and download the RC2040.uf2 Plug in your PICO and drop the uf2 file into the Pico
Making an SD card
Take an empty SD card (this process will destroy ALL the data on it)
Format the card with a FAT32 filesystem either using windows format or a SD card writing program.
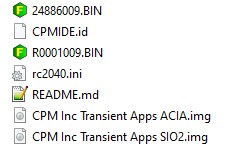
From RC2040 Git hub download the source_files zip (or tar) and extract the SD Card Contents directory.
Copy the contents of the ‘SD Card Contents’ directory onto the newly formatted SD card. You will need to unzip “CPM Inc Transient Apps ACIA SIO2.ZIP”
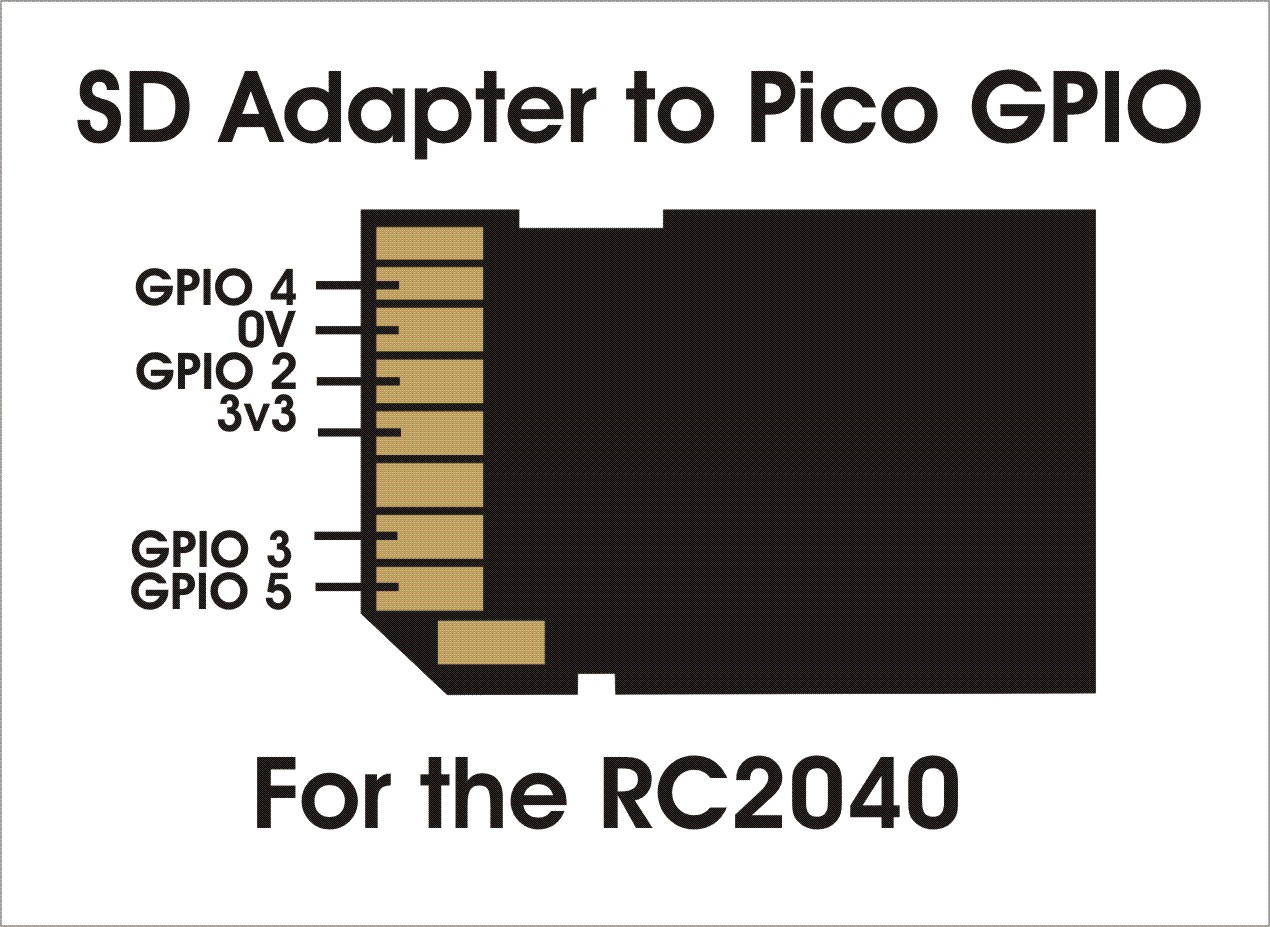
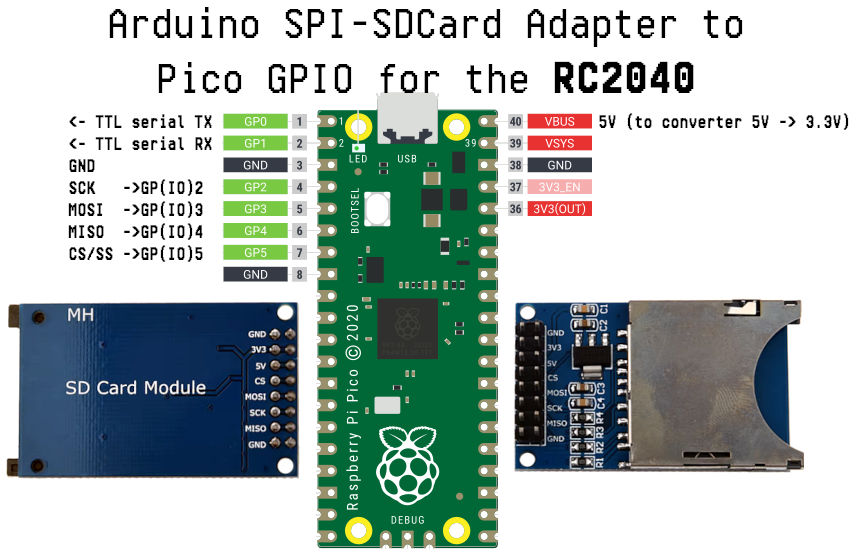
Connecting an SD Card
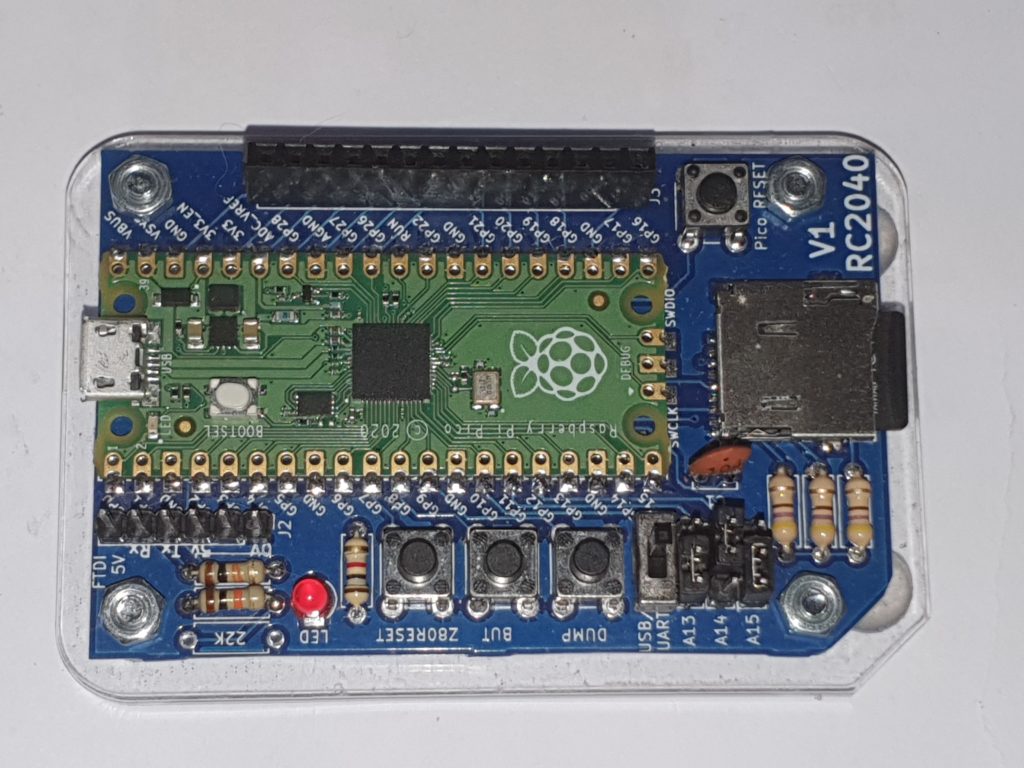
Wire in the SD card to your Pico or RC2040 board
Connecting to the serial port
For communicating with the RC2040, there are two options. By default the RC2040 uses the USB interface. When the RC2040 starts this should appear as a serial port on you connected computer.
I use Terra term, but MiniTerm or putty should work ok too.
#TODO add MiniTerm and putty details
Open Tera Term and select the newly added serial port
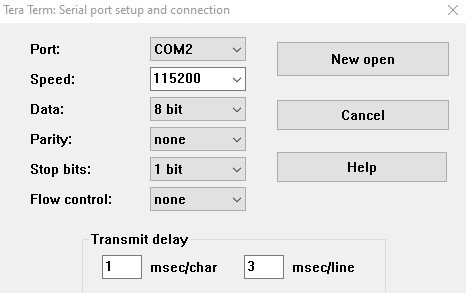
The COM port will vary, but it is usually the last one in the list.
Speed 15200, 8Bits, No parity, 1 stop bit, No flow control.
If you are doing copy and paste via serial, you will also need to set the transmit delay of 1mS per character and 3ms per line to prevent serial overruns.
Click New open and hit enter…
Hopefully you should see
_______________________________________________________________________________
RC2040 more settings
A complete kit of parts for the RC2040 is available here from Extreme Kits